Visual Communication – 30 September to 5th October 2013

It has been a varied and busy week – very difficult to summarise. Having obtained a copy of Saturday’s Guardian (28th Sept) with supplements and a fashion magazine, I set about the task of picking out a story on which to base the creation of a series of typographic exercises and collages. I chose a pair of articles in The Guardian on the same theme of climate change by Fiona Harvey “Just 30 years to calamity if we carry on blowing the carbon budget, says IPCC” (page 17) and the associated article by George Monbiot “Climate change? Try catastrophic climate breakdown” (pages 1& 17).

Creating a series of responses to these articles using hand-drawn type with the aim of communicating 8 key points of content turned out to be a really interesting process although we had to work fast. We were asked to explore a range of different type styles and exploit outlines, reversing-out and creative methods of presenting text and were shown a fascinating series of images by typographers and fine artists using type in their work. Included in the long list were Kate Moross (http://www.studiomoross.com), Amy Unikewicz (http://jellyfever.com) who among other things likes to use objects that mimic letter forms, and Donald Wall (1971) Visionary Cities: Arcology of Paolo Soleri, Praeger Publishers, NY.

Donald Wall 1971 - Visionary Cities

During the week and this weekend I spent time on the internet and in the library looking at the use of letter forms by graphic artists (the book covers were a good start!). Among the sites I found this helpful link  http://www.moonsaildesign.com/typography/inspiring-typographic-artists/ from which I picked out the work of  Craig Ward http://wordsarepictures.co.uk/about/.

We were also introduced to book designs of many forms – maze books, concertina books, hidden books, cut outs and pop-ups and so on. Having raised two children I have seen many kinds of inventive books for youngsters. If you have never seen Janet & Allan Ahlberg’s The Jolly Postman or Other People’s Letters, Puffin Books (1999) then grow up and read it. But the lecture really expanded my view of books as forms of art. The practical  introduction to collage turned out to be just as interesting.  We were shown a number of creative techniques which helped me see the possibilities for using the images I had brought in for work on the climate change book project.

My hand-drawn typography was primitive but I liked 3 of the 8 I did and I used those in the book. The 16 collage and sketch images making up an A3 page were more successful. Most of the photographic sources were my own (Wikipedia commons supplied a Moscow traffic jam, cracked mud and a tornado). Magazine images supplied faces and spectacles and a window envelope provided a window (no kidding) a pattern and a “Hurry” message. Some old Letraset I had came in handy too.

Climate change booklet presentation (smaller)The book design I came up with is a fold-out – probably better shown than described.

Climate change booklet cover (much smaller)Climate change booklet open 1 (cropped) smallerClimate change booklet open 2 (cropped) smallerClimate change booklet open 3 (cropped) smallerClimate change booklet open 5 (cropped) smaller

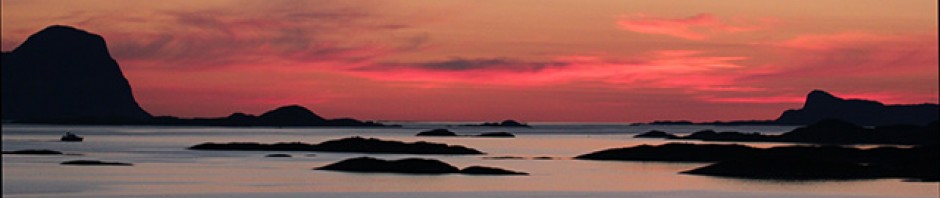
The mirror card panels (4th image) when vertical reflect the text and imagery around them as well as the reader. The final (5th) image shows the back ‘cover’ with one of the more striking collages, superimposing a shot of a forest killed by flooding that I took in Yellowstone (USA) with one of some extraordinary flooding in Hyde Park (London) in 2010.

Tile7 (smaller)

Making the book, the techniques involved and developing the use of type and collage in the book has been good fun and I feel that it really has developed my skills. Having to work really fast has been a strain but interestingly sometimes some creative plusses come from problems. For example, being locked out of all the photocopiers by a paper misfeed (unable to log on to another while the jammed one still had me logged in and unable to log out until the job was complete) in the final stage of book construction forced me to compromise on getting some of the front and back cover images exactly the ‘right’ size – but it gave me space for the title lettering and perhaps the negative space around the image adds impact. Anyway, I got good feedback from a fellow student in a peer-review session.

In the middle of this week, Wednesday, was our contextual studies and drawing classes. In groups of about 6 the class researched different modern art movements. We looked at Surrealism – which sprang from Dadaism and was strongly linked with Freudian psychology in its views of dream worlds, imagination and the subconscious. I was able to remind myself about some of the weird and wonderful works and philosophy of its proponents – particularly André Breton, Max Ernst and Man Ray, not to mention Salvador Dalí, René Magritte and others. New to me was Dorothea Tanning who did some amazing work and produced surrealist art having met Ernst in the USA during the 1940s http://www.dorotheatanning.org/.

The drawing classes were also great and we were shown some great work by established artists and other students as inspiration. Both charcoal as a medium and drawing with a long wobbly twig dipped in ink are things I have problems with – so a session involving these was worthwhile. We brought in three objects, something spiky, something creepy and something soft. My Russian copy (in metal) of a Walter Bosse designed ceramic ashtray in the form of a hedgehog, a cast iron spider paperweight and a cloth. We were asked to adopt certain ways of working, smudging, hatching, removal with an eraser etc. Some of the other students drawings were superb, but mine were pretty run-of-the-mill. Images speak a thousand words so I shall end with the one I felt to be most successful – you can imagine the others.

Drawing with twig & ink

Drawing with twig & ink

Posted in Art & Design | Tagged , , , , , , , , | 14 Comments

A ‘week of crisis’ 23-27 September 2013

3D Design project 23-27 September 2013. We were asked to consider a wide range of design ideas as “a response to crisis” and to  consider our responses for a crisis of any nature at any scale from personal to global. I researched several ideas: emergency housing following a disaster (e.g. using converted shipping containers; Shigeru Ban studio);  a response to the increasingly critical need for low energy use in building design (e.g. the Carpenter/Norris design for a ‘solar pipe’ and heliostat in the Morgan Lewis international law office Washington DC, USA); and an improved design for solar water disinfection bottles which simply and cheaply use heat and UV-A from sunlight to kill pathogens in water – making it potable (e.g. the design by Alberto Meda 2007).  As an ecologist  I am acutely aware of the negative environmental impacts of external artificial lighting which not only interferes with our view of the night sky, causes aesthetically unpleasant light pollution in landscapes, but also has significant negative impacts on a wide range of wildlife – particularly flying invertebrates and bats. For such wildlife, our modern over-lit nocturnal environment truly is a crisis. I spent some time scoping a design for a new low energy LED luminaire for an external light that would limit spillage and be filtered to screen out UV emissions. However, I was drawn away from this by reading a book on design in relation to disability (Pullin, Graham (2009) Design meets disability, MIT Press, 341pp.). I read about Aimee Mullins’ prosthetic legs. Aimee is an American athlete, born without fibulas, who had her lower legs amputated while still an infant. She went on to break track world records at the Atlanta Paralympics in 1996. As well as wearing running blades and more conventional flesh-toned prosthetic legs, she celebrates her opportunities to use highly decorated, glamorous and unusual legs, including elongated legs, wooden carved legs, transparent ‘glass’ legs and so on. In this way she has become recognised in fashion and the arts, excites envy in women with only natural legs and is an inspiration to many. I quickly found there to be plenty of web-based information about her, her good works and her many legs (e.g. www.aimeemullins.com).

I then began thinking about children and older young people who need a prosthetic hand. My idea for development was to develop a superhero-styled ‘skin’ or cover for a conventional prosthetic 5-fingered hand and forearm. The ultimate extension of this idea would be to provide a range of designs that would be the envy of other kids. I searched widely on the internet for images of prosthetic hand designs. Some were highly robotic in appearance and actually looked pretty cool in their own way with a “Terminator” look. But although a few were brightly-coloured, most were either robotic or variously toned flesh colours attempting to conceal and disguise the prosthesis. Many superheroes have ordinary-looking hands or simply wear gloves with no distinctive detailing. I needed a glove and forearm that was a recognisable ‘brand’ for the relevant superhero but also practical. For example, the over-sized armoured fist of Fisto – a Masters of the Universe character – was distinctive but would be a clumsy impediment for a child.

As a beginner in 3D design, I had to built a mock-up of our design in about a day – so practical issues were a real constraint. I looked at Iron Man – very distinctive and would fit well with the robotic look and the servo motor noises that the real prosthesis would make. I made a couple of drawings, some paper fingers and considered vacuum forming the ‘armour’ but it really was too ambitious to build in the time available. Iron man also has lights in his palms.

So I chose Spiderman and Mystique (Marvel comics characters) – both with distinctive but relatively simple styling and suitable for boys and girls respectively. The idea is that the ‘skin’  would be like a long glove drawn over the actual prosthesis.  Time only allowed me to make one so I chose Mystique – Spiderman was left as a concept drawing and fabric sample. Mystique is a strange and rather sexy character, rather on the wrong side of the tracks, that might appeal to older girls.

I will spare the reader the details of how I made the mock-up, I tried various options (including casting my own hand) but in the end that looked less appropriate than the embarrassingly crudely decorated and painted rubber glove (filled with expanding foam) I finally produced – see the image. A real one would be probably made from silicone rubber, more faithfully shaped and styled and have the hand and forearm in separate overlapping sections to allow the hand to rotate 360° at the wrist (as some prosthetic hand designs do).

Prosthetic hand - Mystique skin presentation photo (Small for blog)

It seems likely that this idea could have already been thought of by others but I failed to find examples of this concept elsewhere. Reflecting on the project, I think there is a genuine opportunity for the superhero industry to get together with a charity to make ‘skins’ like this in various sizes and styles to enrich the lives of children – young and older – who need to wear a prosthetic hand.

Reflecting on the whole week. It has been interesting and challenging getting to grips with this project while in the throws of settling into the Foundation year course at UCA Farnham. I have begun the development of my ‘sketchbook’ and ‘research’ file. I have set up the blog (here it is) and now I have to tackle the reflective journal as well as finish the final presentation drawings for this project. I am very conscious of being more than three times the age of most of my fellow students but they have been great to work with and it has been very stimulating to see the inventive and skilful work they are doing.

Posted in Art & Design | Tagged , , , | 2 Comments

Printing – then and now.

As a child, my father who was a skillful artist, showed me how to do linocuts. The great thing was how easily one could take prints at home with just ink, paper and a roller or the back of a spoon. The only example I have of those times is this Christmas card that I made aged 14.

Since then, printing has always interested me, and I have longed to get back to it. I particularly wanted to try etching and intaglio printing in general but the need for a printing press and the use of corrosive chemicals to etch into the metal plate was always a barrier.

However, in November 2014 I got the opportunity to attend a short workshop at The Lightbox in Woking (Surrey, UK) run by local artist Richenda Court. This was using a ‘drypoint’ technique in which you use a scribe to scratch your design into the surface of an acetate (plastic) sheet. This does away with the need for etching chemicals, although the plastic plate you create will not have the long life of a metal plate.

The workshop was just 2½ hours so I prepared a sketch of a running hare to trace (you can see through the transparent acetate plate) and worked fast. Of course, any design you make will be reversed left-right when it is printed. Once the design is scratched into the surface, it is covered in ink and the surplus wiped away, leaving the ink principally in the scratches and (if you want) on the surface of the plate to create tones and textures. The plate then goes into the press with a sheet of paper which is still damp from having been pre-soaked to increase its flexibility and subjected to high pressure from the roller of the press. The paper is squeezed into the scratched lines where it picks up the ink. Every print is unique because you re-ink and prepare the plate every time and one can be really creative about how this is done to create a heavier or lighter image, or make textures as you wipe away the surplus ink.

In April 2017, I again explored intaglio printing in a one-day workshop run by Chertsey Artists, this time using an aluminium plate and copper sulphate solution to etch the metal. This technique requires you to coat the plate with a varnish, which you then scratch through to expose the metal. The plate is then immersed in the etching solution which is repelled by the varnish and acts only on the areas of metal exposed by the scratching. Once the solution has etched into the plate to the desired depth, the plate is taken out, washed-off and the varnish removed. The plate is then ready for printing just as described above. For this workshop I again prepared thoroughly – this time I created the sketch in Photoshop using manipulated photographs of Sanderlings (see right). Of course, unlike the acetate plate, you cannot see through the aluminium plate, so you have to trace-down your design on to the surface before working with the scribe to create the final result. This is the best of two or three prints that were made. As you can see, I have much to learn, but I really enjoyed the process and feel pleased with the result. The birds look a bit wooden but I am pleased with the textures and using variations in the inking to create lighter and darker areas and a dusky atmosphere was really successful.

The need for access to a press to do more intaglio work has limited my options since then, but this summer (2022), thanks to some birthday gifts of lino and ink from my elder daughter, I revisited linocutting. I made use of some of my father’s old cutting tools, but I need to get better at re-sharpening them. I’ve made just two pieces so far. A zebra, and an ammonite for a friend’s birthday card. Each done in a day. The latter was based roughly on a Jurassic species (Stephanoceras humphriesianum) and I textured the background with a sponge in an attempt to mimic stone before printing. I will definitely be doing more linocutting and will hopefully improve, take more time and use more than one colour of ink.

Posted in Art & Design | Tagged , , , , , , | Leave a comment

University days – some more looking back

Student days studying zoology left little opportunity for practising art. But during my undergraduate years at Royal Holloway College, University of London (Egham, Surrey, UK) my friend Nick Giles and I produced dyeline posters for various events (discos, clubs, visiting bands etc.). I’d made posters for the film club at school but those were single originals posted in the school noticeboard. But here we needed a score of copies or more. Dyeline was a pretty primitive but relatively cheap form of printing and was the only method available to us.

The original drawing was produced on tracing paper and then, in a machine with big rollers and a UV lamp, monochrome contact prints were made on to large sheets of pastel coloured sensitive paper; one at a time. The rendering of tones was tricky – you had to control the exposure time by speeding-up or slowing-down the rollers. Smudges or creases in the paper showed up strongly in the final prints, so there was no room for mistakes. Letraset, especially the large stuff, was expensive, so all were hand lettered – often done in a hurry in a travesty of some typeface – and it shows! Not all have survived, dyeline prints fade, but here are a few (click to enlarge).

A couple for a weekly disco “Stomp”.

This pink one below was inspired by the  comic strip ‘Barry McKenzie’ created by Barry Humphries (a.k.a. Dame Edna Everage), drawn by Nicholas Garland and published in the magazine Private Eye. The over-the-top Aussie lingo was great fun and I cobbled together some choice phrases for the poster. Anyway, the Australian band (the Bushwackers and Bullockies Bush Band) just loved it and I enjoyed their praise.

Another poster for the folk club featuring musicians Dave Peabody and Hugh McNulty. This and the two below are photos of the tracing paper originals rather than prints

One for the Winter Ball at Kingswood (a hall of residence). An awful lot of lettering was needed and there was little time for the drawing! The layout leaves a lot to be desired.

Finally, a poster I made to raise awareness of the Ornithological Society which organised occasional birdwatching and natural history interest trips.

The smew (one of our most beautiful ducks) and the great-tit in the ‘O’ were redrawn from the Reader’s Digest Book of British Birds, which back in 1974 was one of the more nicely illustrated bird books available. The choice of subjects was partly dictated by the need to have a strong black and white subject.

I doubt that anyone would dream of making posters like this now. But maybe there still are artists exploring the special qualities of dyeline reproduction. It’s interesting how different media generate their own methodological disciplines but also have their own special qualities when making art.


Posted in Art & Design | Tagged | 2 Comments

More retrospectives – doodles and a serious case of the clamp

After my previous post, I have succumbed to the temptation of revisiting yet more of my old early 1970’s artwork. Looking back, I produced quite a bit, but I’m going to have to be very selective. I was heavily into doodling – actually something I’d like to start doing again – but you need to feel that you have the time to do something aimless. Doodling frees you from any requirement to produce a finished drawing and there is no pressure to produce anything meaningful or technically accomplished – the result is ‘just a doodle’.

Here’s a sample of some bizarre doodles produced when I was about 15-17. I have little idea what I was thinking (if anything) when I drew them and retrospectively to invent meaning now would be nonsense. This Rorschach blot is a good start (click on images to enlarge).

My doodle of a little house by an alpine glacier with a lone sheep on the hill and a tiny man on top of a post with a parasol is genuinely meaningless. The others, just fun with felt pens, weird epic scenes, expressing a mood or indulgence in a bit of macabre imagery are no more profound.

At the time I was also trying to practice more serious observational drawing. I enjoyed attempting freehand drawings of things like engine parts, electronic valves and so on. Just a sample of this kind of work is this sketch of a friend’s 500cc Royal Enfield.

Finally . . . a rusty scaffolding clamp! I did a series of sketches of these clamps and I remember enjoying trying to portray (in ink and pencil) the deteriorated condition of this formerly crisp, clean and functional piece of equipment.

Thanks for staying with me. My next couple of blog entries will stay in the past but will move on a few years prior to coming right up to date.


Posted in Art & Design | Tagged , , , | Leave a comment

Return of the blog

It has been over 3 years since I last made an entry to this blog and I have been wondering for a while about how to summarise what has been going on since then. After completing the Foundation art course at UCA Farnham in 2014 I resolved to keep making art but suddenly lacked impetus and facilities. The great thing about being on a course is that you have tutors and peers to encourage and stimulate you (and the tutors at Farnham were great) and a well-equipped workshop. At home it’s the garage or the dining table. So in September 2014 I enrolled on two adult education classes in Woking (Surrey), watercolour painting (tutor Will Lawrence) and life drawing (tutor Kirsten Finch); each once a week. I stayed on the watercolour class for a term – long enough to learn some basic techniques from Will who was a skilled painter and tutor. But then decided to ‘go-it-alone’. I had not progressed much yet but I felt that I needed to practice alone and to develop some ideas. Here are just a couple of pieces produced in class – you can see that my skills were (and still are) very limited.

However, although I kept-up with my sketch book, ordinary daily life took over and there was also my involvement (which still continues) in the Regent’s Park hedgehog project (https://www.royalparks.org.uk/managing-the-parks/conservation-and-improvement-projects/hedgehogs). All this became a good excuse to procrastinate on the painting. I also lent a hand to Stephen Featherstone (one of my Foundation course tutors) who has created a superb short film for the Stopgap Dance Company (https://vimeo.com/170614249). My contribution was merely to cut-out (with a scalpel) several hundred of the many thousands of black and white images that Stephen needed to make this inspiring  film using only stop-motion and no digital effects. Individual frames from videos of the dancers were printed in greyscale and then cut out and re-animated frame by frame to create a unique result. My role was a non-creative one, but I have a real buzz from knowing that I helped Stephen, in a small way, to realise his project.

Despite my lack of progress with the watercolour painting, I had re-discovered the bug for life drawing and continued with Kirsten’s weekly classes. Apart from a single session during my Foundation year at Farnham, I had done no life drawing since secondary school. Encouraged by my art teacher Ken East at the Sir Frederic Osborn School (Welwyn Garden City) I attended evening after-school sessions at St Albans School of Art in 1971, aged 16. The weekly bus journey from WGC to St Albans seemed like a major expedition to me in those days, but the experience was formative.

*He also somehow got the school to allow me to paint two murals in the school. A small one in acrylics outside the biology labs of an aardvark in a South African setting, plus a larger surrealist horror landscape (painted in emulsion) outside the domestic science classroom.

Here are just a few of those old life drawings from 1971 (graphite pencil) – smudged and foxed with age. Click on them to enlarge.

And some gestural sketches . . .

. . . and to finish, a self-portrait, late at night wearing huge Wharfedale headphones. Yes, in 1971 I had long hair. I did have to Photoshop this image to remove the marks of some nasty foxing (from living in damp places). It was a fair likeness at the time but the years have taken their toll!

I was actually quite prolific then and I produced a lot of stuff in paint, felt-pen, ink and even pyrography on wood. I had the advantage of an encouraging father who was an artist and designer and a sister who was also very artistic. It was a struggle to know whether I should try for a career in art, but I went for science in the end. Probably a wise choice.

In my next blog I’ll share some more recent stuff. I am still drawing, taking photographs and I’ve had brief flirtations with intaglio printing which I someday hope to develop more.

Posted in Art & Design | Tagged , , , , , | 2 Comments

Fun with a lightbox and some cellophane

A couple of weeks ago I bought myself an A3 LED lightbox (Huion). At the same time I bought a cheap pack of A4 cellophane sheets in assorted transparent colours. So, today I had some fun making some simple compositions and photographing them.  This was purely a bit of experimentation arranging the sheets without cutting them just to explore the effect of the strong overlapping colours. The results have a bit of a 1960s feel to them. The images look better bigger so, if you like, click on each image to enlarge the view.

Lightbox + cellophane 9 Aug 2014 (1) smaller ©Nigel Reeve Lightbox + cellophane 9 Aug 2014 (2) smaller © Nigel Reeve Lightbox + cellophane 9 Aug 2014 (4) smaller © Nigel Reeve Lightbox + cellophane 9 Aug 2014 (5) smaller © Nigel Reeve


Posted in Art & Design | Tagged , , , | Leave a comment

Blowing in the wind – capturing movement

I often spend a lot of time avoiding blur on photographs; I usually want my subject to be sharp. Yesterday’s blog post was about capturing the movement of surf with a fast shutter speed. Nevertheless, blur in still images can be also used to capture movement in a beautiful way – like natural brushstrokes. Sorting through some of my images today, I found this one of a series I took in May 2014 of a bank of cow parsley (Anthriscus sylvestris) being thrown into a turmoil by the wind.  (Click on images for larger view)

Cow parsley blowing in the wind, Basingstoke Canal 9 May 2014 (2 smaller) © Nigel Reeve

The image reminds me of the movement of water and surf and brought to mind a picture I took a year earlier in Devon of a cliff-top patch of sea pinks – also known as thrift (Armeria maritima). Unlike the cow parsley image which I took on a dull day, I had to really struggle in the bright sunshine to get the speed slow enough to capture the motion, stopping right down to f32, at 100ASA, plus adding a polarising filter in order to get the speed down to 1/6th of second. I used a hand-held 70-300mm zoom on my Canon 550D.

Thrift nodding in breeze, Wembury 1 Jun 2013 (1 smaller) © Nigel Reeve

Although the movement is limited, I think it still captures some of that painterly quality that I was looking for.

Sometimes I have got really unexpected results – this photograph I took of the water falling from a fountain in The Regent’s Park (London) back in 2012 was taken at f22, 1/60th of a second. I was just looking to capture the streaky glitter of the falling drops, back-lit by the sun, but if you look closely some of the drops trace a zig-zag path. This is presumably because they are somehow hitting each other and bouncing around. Whatever is going on, I like the result.

Water from fountain, Regent's Park 7 Nov 2012 (6 smaller) © Nigel Reeve


Posted in Art & Design | Tagged , | 1 Comment

Photographing patterns in the surf

We spent the weekend with friends in Devon and visited the wonderful beach at Wembury, near Plymouth. The surf was up with a brisk on-shore wind, and the spume threw itself into amazing patterns as the waves buffeted the rocks. A fast shutter speed (1/500th of second) froze the weird and beautiful contortions of the foam that you can see in this crop of one of the images (click on images to enlarge).

Wembury surf (1) smaller © Nigel Reeve

This frozen form has a lovely sculptural quality to it but it would be quite a challenge to create in 3D.

This second photograph (uncropped) is an attempt to capture the dynamic seething quality of the water as the incoming surge fights against the drag of  the retreating flow from the previous wave.

Wembury surf (2) smaller © Nigel Reeve

Although I originally shot them in colour, I found that I preferred the look of these two images in greyscale. To me there is sometimes something about a lack of colour that enables one to be more aware of the tonal qualities of an image.

I took only a few shots because the wind was driving a penetrating fine mist of salt spray all over my lens and camera. Next time I shall be better prepared and take a plastic bag to keep the worst off.


Posted in Art & Design | Tagged , , | Leave a comment

Photograms from LCD screen experiments

I have had a break from blogging since completing my Foundation Art and Design course at UCA Farnham. In the end, I got three of my four pieces into the end of year exhibition. The only one not shown was Hare – the simulated road kill with LCD screen showing a sequence of images visible through the eye of the animal. Getting three pieces shown is a good result and I managed to get over being rather grumpy about not getting all the pieces shown. I was also happy and proud to be awarded a distinction grade for the course. Of course I worked hard but what I did achieve was in no small part due to the encouragement and support of the course team. Many thanks to them.  The end of year show was impressive with some professional and inspiring art on display. Several of my fellow Foundation students produced pieces of a high standard matching those of the BA and MA students also on show.

During the assessment week (when there were no classes) I returned to the idea of making photograms in a darkroom by placing photographic paper directly on to the LCD screen of a laptop to create analogue prints from the digital image display.  To control the exposure, I inserted the images into a PowerPoint show where I could use the timing function in the software to alternate one or more images with a totally black background – effectively flashing the image(s) for a fixed number of seconds. However, one problem was the screen brightness – could I get it black enough so that the paper was not fogged? I turned down the brightness of the screen as much as possible and to my eyes it seemed quite black when the image was not shown. I felt that it should work. Nevertheless, even only one second of exposure of the image turned out to be enough to over-expose the image and the ‘black’ background was light enough generally to fog the image with the paper in place on the screen for only a few seconds. The over-exposure was such that more than a few seconds in the developer resulted in the whole paper becoming black. I was using Ilford Multigrade IV paper (10″x8″ sheets).

Here are two of the experimental results – scanned but with no post-production so you see them as they are. The first is from a silhouetted positive image of starlings roosting among branches with a second image of a cloudy sky superimposed, the second an ancient oak tree in the snow inverted (negative) to make a positive print. As you can see, they lack contrast and the white areas are over-exposed (grey) – despite the short exposure.
(Click on the images for larger views)

LCD photogram, Nigel Reeve June 2014 (1) smaller

LCD photogram, Nigel Reeve June 2014 (2) smaller

There is some potential here but they are not what I was trying to achieve. My aim was to be able to make montages of photos but I was not able to work with the sub-second exposures required. Perhaps I am making some basic errors in my approach to this, or maybe I would be able to get better results with a slower paper, maybe a cyanotype – if the LCD screen emits the right spectrum of light but my feeling is that there probably is not enough UV.

Of course I can create very similar photogram-like montages with greater control and no need for a darkroom by merging layers in Photoshop. Maybe that’s my way forward, if I want to develop this idea, but there would be a loss of that special quality of each photogram being a unique one-off performance.


Posted in Art & Design | Leave a comment

Work submitted – what now?

Submitted my sketchbook, journal, blog, research file and portfolio on time today but was disappointed to find that space had not been found for two of my series of four pieces – the Hare and the Landscape-Soundscape (see previous blog). They will not be hung now and, although I am assured that they will be looked at for assessment purposes, not being able to show half of the series is deeply disheartening.

Last Sunday I visited the Hepworth in Wakefield (Yorkshire, UK) to see the Philip-Lorca diCorcia exhibition.

http://www.hepworthwakefield.org/whatson/dicorcia/

It was an exciting collection of photographs including the series Hustlers (1990 – 92) in which diCorcia paid male prostitutes the going rate (which is given in the titles) to pose for his photographs. The very high quality images are remarkable and evocative and one is free to imagine the stories behind each of the participants.  Also the series  Lucky 13 (2004), A Storybook Life (1975-99), the Streetwork series (1993-99) in which passers-by are caught by the camera and Heads (2000-01) – portraits of people taken as they walk by on a busy street.

Here is one of the Heads.  The quality of the image and the lighting make it seem astonishing that this is not a studio photograph. All in the series have this remarkable quality. If you can get to Wakefield, don’t miss this exhibition.

Today, I was also sent a link (thanks Ian) to  the work of Bartholomäus Traubeck. The work featured (interview and also soundtracks) are an audio translation of the growth rings of different tree species, with wooden discs played on a vinyl record turntable with the cartridge in the pick-up arm replaced by a camera – with the signal creating piano notes.  This seems very original and interesting to me. The interview is really unpretentious and the result is worth checking out.

http://datagarden.org/4364/interview-bartholomaus-traubeck-on-years/

You can listen to the sounds and even buy a download of the album from:

http://traubeck.bandcamp.com/album/years

In answer to the rhetorical question ‘what now’ in my title – actually I am not sure. I shall take a break, but I have an exciting hedgehog ecology project in London starting shortly and I am still involved in the Qatar hedgehog project. Tidying up the house and going for some countryside walks  also seems like an attractive option during which I can enjoy a bit of photography. Then I shall start looking for other ways to make art.

Posted in Art & Design | Leave a comment

The final stretch

Tuesday 6th May.

With all four pieces completed I got them all into the studio last Thursday morning. Unfortunately, such is the difficulty of finding enough space to display the works of over 40 students that as I write this two of the pieces (the Hare and the Landscape-soundscape)pieces are still not hung. In fact, there may not be room for them which would be a  disappointment.

The two works that are shown are:  (Click on images for larger versions)

Title: Pig.
Size (mm):  390(w) x 19(h) x 28(d) and plinth 895(w) x 118(d) x 220(h).
Materials: Painted wood, PVC-U, electrical components with LED light and viewing eyepiece, cast resin, iron chain. Description:  One of a series of four works presenting combinations of incongruous imagery and/or sounds and odours. The view through the endoscope eyepiece is activated by a foot switch.

Pig, © Nigel Reeve (smaller) Pig - closer view -© Nigel Reeve (smaller) Endoscope with light showing venus flystrap (2 cropped smaller)

Title:  Pig projection
Size (mm):  Mould components when assembled 370(w) x 230(d) x 250(h).
Materials:  Silicone rubber, resin and fibreglass, carousel projector with eighty 35mm photographic slides. Description:  One of a series of four works presenting combinations of incongruous imagery and/or sounds and odours. Here the interior of the mould used to cast a resin model pig provides surfaces that provide a substrate for a selected range of 80 projected images.
Pig projection© Nigel Reeve (Smaller) 1 Pig projection © Nigel Reeve (smaller) 3Pig projection © Nigel Reeve (smaller) 2 Pig projection© Nigel Reeve (Smaller)

I think both these look good in situ but if I were to be picky the first could have benefitted from targeted lighting. The projection piece worked very well and a change of carousel fixed the problem I had with sticking slides. I like the way I have been able to get the light streaking across the surface of the plinth and the way the image spills across the pieces of the mould and the wall behind.  I am hoping that my choices of images of other organisms will please and maybe provoke some thought in the audience.  With a full magazine of 80 it takes some time to see all of them even with only a 4 second change-over time set.

The other two pieces (not yet displayed) are:

Title:  Hare
Size (mm):  530(w) x 170(d) x 430(h).
Materials:  Hardboard and wood, papier mâché, artificial fur fabric, gravel, soil, PVA glue, acrylic paint, bitumen paint, felt pen, clay, plastic lid, fishing line, aluminium wire, plastic Fresnel lens, LCD panel and SD card, dead fly (found), scent. Description:  One of a series of four works presenting combinations of incongruous imagery and/or sounds and odours. Here the viewer is presented with a simulated wild animal road casualty and is invited to view images through the peephole of its eye. While peering through the eye, the viewer becomes aware of the scent of aromatic oils that have been applied to the hare’s fur.

Hare © Nigel Reeve (smaller) Hare © Nigel Reeve (smaller) 2

Title:  Landscape – Soundscape Size (mm):  595(w) x 50(d) x 420(h). Materials:  Digital photographic print (260 gsm lustre finish) mounted on hardboard and wooden frame, MP3 player with headphones. Description:  One of a series of four works presenting combinations of incongruous imagery and/or sounds and odours. Here the viewer is presented with a photograph of a landscape while invited to listen to an eight minute sequence of five selected audio recordings.

Desert views, Qatar 2014 (10b smaller) © Nigel Reeve

Sorry that I can’t give you the soundtrack but there is a range of incongruous sounds 1) waves lapping on a rocky shore, 2) a noisy bar with people playing pool, 3) church bells with a background of rural birdsong, 4) heavy traffic recorded at a busy junction on the A31 in Farnham (UK).

—————————————————————————————————-

As I look back on the course I am surprised at how much I have managed to do in the time but I still have many ideas for work that I wish I could have realised. It is interesting for me to look back and see how my ideas changed during Part 3 of the course but also to look back at Part 2 which was probably the time when I produced the most satisfying work (for me) and used a real diversity of styles and media. I can only hope that the work I submit will please the staff and visitors to the exhibition 23rd May to 8th June.  I am very grateful for the support of the academic and technical staff at UCA and I have enjoyed meeting them and fellow students.

As I drove home along the A31 Hog’s back in beautiful weather the wonderful sky with cumulus clouds forced me to stop and take a photo. Here is a hastily stitched panorama as a fitting final pre-assessment entry to this Blog.

View from the Hog's Back 6 May 2014 (smaller) © Nigel Reeve


Posted in Art & Design | Leave a comment